DIY’ing the Sally Costume From The Nightmare Before Christmas Movie For Halloween
This blog may contain affiliate links. This simply means when you make a purchase through my blog that I receive a small portion from your purchases at no additional cost to you. Thank you for supporting my blog.
A couple of weeks ago my youngest daughter approached me, asking if I would make her Halloween costume. She wanted to be Sally from The Nightmare Before Christmas. Here’s an image I found online of another Sally costume.

At first glance, my response was, “No.” It appeared beyond my sewing capabilities and I honestly didn’t think I could do it. After all, I had only sewn pillowcases, and most recently my very first quilt—up to this point. Clothes were a bit out of my comfort zone!
Fast forward several days, a bit of sleep, and a few too many coffees on a Sunday morning and suddenly I was saying “Yes!” With a basic plan in mind and my wallet in hand, I was off to Joann Fabrics.
Finding The Fabric And Knowledge For Making The Sally Costume
My idea was to find a basic t-shirt dress that I could use for my pattern. Though I didn’t have one in hand yet, I assumed this style of dress would be made from knit material. So, this was the type of fabric I sought out at Joann’s. Never mind the fact I had never sewn anything with knits before! But, when I’m all in, I’m all in - whether I’ve done it previously, or not! We’ll blame that trait of mine on my OCD! :)
While at the Joann Fabrics cutting counter, I asked the lady measuring out my material a few questions. The first of course being, “Have you ever sewn with knits?” Thankfully she had and gave me a couple of suggestions that proved super helpful for this project. The first recommendation was to get a walking-foot attachment for my sewing machine—thankfully I already had one! She explained to me this would help move both the upper and lower materials through the machine at the same time while being stitched. As a result this would reduce the potential for either fabric to pull through faster or slower than the other, making for a more uniform outcome. Her second suggestion was to use a ball-point needle in my machine. From what I gathered from her during this quick tutorial, a ball-point needle moves the threads of the knit material apart instead of cutting them, thus reducing the potential for fabric runs while sewing. So, $15 later, a little bit of new knowledge, my material, and some ball-point needles in hand, I was on my way to my next stop—Goodwill!
Here, my daughter met me and tried on several knit-style dresses. Low and behold, we found one for a mere $8. We were winning!

Sewing The Sally Costume
Later that evening I dove into the project, the only way I know how…head first! My basic idea was to create a new color-blocked front like the one seen on the Sally costume above. From there, I planned to cut the front of this red dress off and sew the new color-blocked front onto the already-existing back. It made total sense in my head. Until I got to the sleeves. I knew sleeves were supposed to go on separately. So while I was a bit perplexed, I pushed my doubt aside and proceeded with my plan. No, it wasn’t the “right” way, per se, but it would get the job done. And at this point, that is all I wanted to accomplish. So, I stuck to the plan, free-handed the color-blocks onto tracing paper, pinned the tracing paper to the material, then cut all of them out piece-by-piece. Here’s a look at that process. (And my other daughter on her computer!) grrr. Lol!

Now came the hard part. Sewing the material together and not ruining it! Lol!
Thankfully, I had plenty of fabric scraps leftover from my color-block cuts. So, I used these to practice my sewing skills on prior to actually assembling the dress pieces. In addition to talking with the lady at Joann’s and asking her advice, I also opted to watch several YouTube videos believing the more information I had about sewing knits, the better the outcome would be. And, I must admit, it helped. In fact, I learned through one YouTube channel that when working with knits it is easier to use a zigzag stitch over a straight stitch. This proved true while practicing on my scraps, because when I used the straight stitch, the thread tended to skip. But when I switched to the zigzag stitch, it was perfect! So, with all that practice behind me, it was officially time to put what I had learned to the test. And, by the grace of God, it worked!

I was so elated once this part was complete but, I wasn’t quite done. Next, I needed to disassemble the red dress and remove the front from the back. While I originally considered just cutting the front off, I opted to sit down with my seam ripper and take it apart stitch-by-stitch. This was time consuming, but I think in the end it was the best way to go. Once the front was off, it was time to sew the new color-block piece to the existing back.

I could hardly believe it when I hung it up! It actually worked!
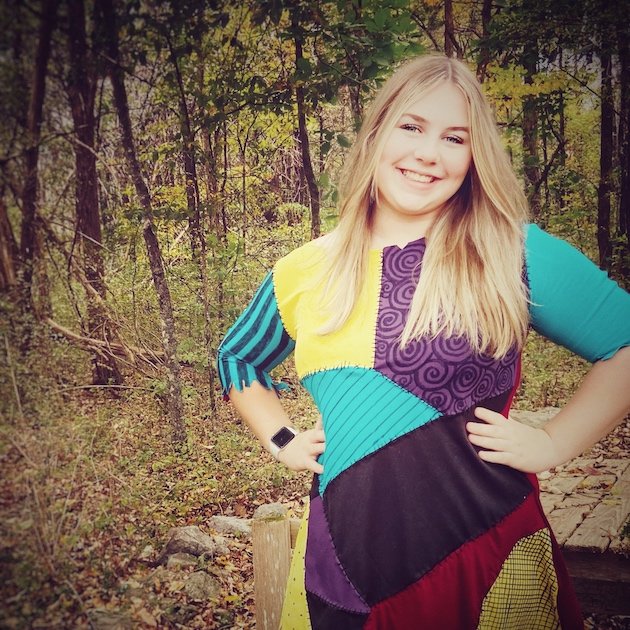
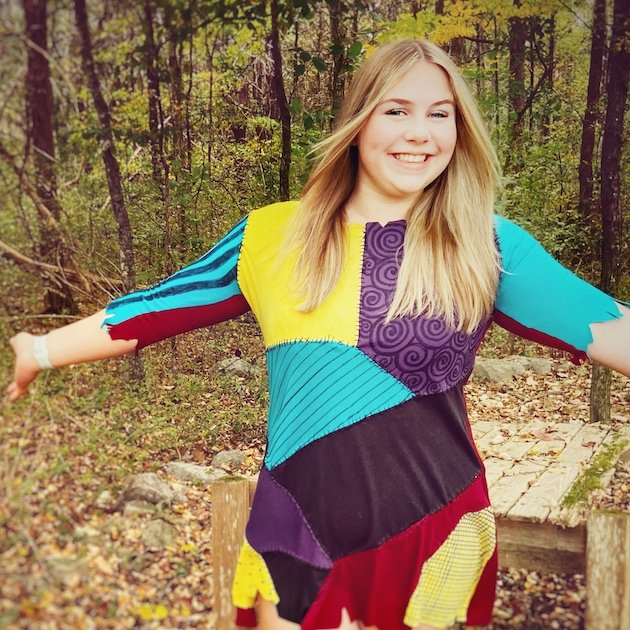
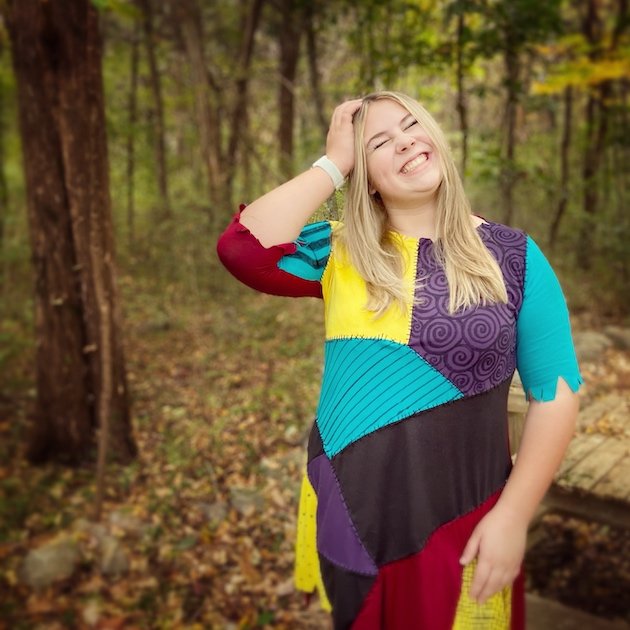
Yes, the arms are uneven and so is the bottom edge, but I knew my daughter was going to zombify the arms and hemline anyways, so that didn’t matter. Being that I didn’t have a pattern to follow, I’m beyond happy with the end result. In my mind, the hardest part was done. Now we just needed to add in the doodles to make it look like these were different patterned pieces put together and then add in the hand-embroidered stitching between all of the fabrics. While I enjoyed the doodling part, the hand-stitched embroidery (while it looks great!) was super time consuming. I didn’t mind it necessarily, but I think if I were to do it again, I’d just use a sharpie for those little lines! Ha!! In the end, my girl was super happy. And, for me…that was all that mattered!! She’s the prettiest zombie I’ve ever seen, if I do say so myself!
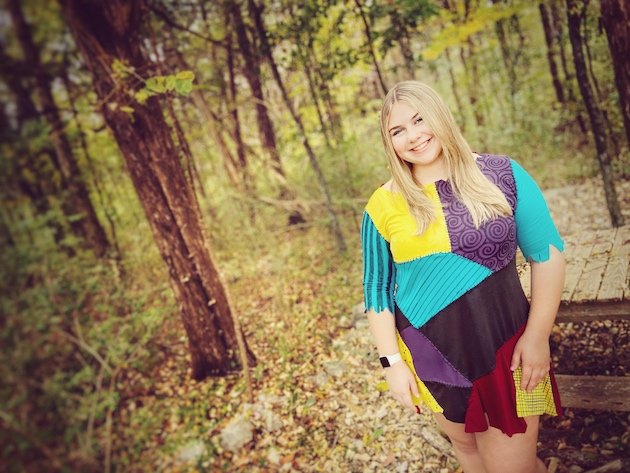
I still have a couple of circles and a patch to apply to this piece, but all in all, it is done! Such a fun costume and I’m so glad I said, “Yes!”
Til next time,
